Saturday, 29 October 2011

Assignment Model 3 - Death star

The third model i did was the Deathstar.
The following models was the updated version of the one I submitted in the CD at the 28th October.
Mainly re-made the turret to a higher standard.

The download link is here if necessary.
Download link (40mb on Google docs)

First model was the Deathstar which were done witht the extrude polygon methods.


The second model was the "destroyed" version of the deathstar, edited from the above model
with the Boolean subtraction method, and deleting vertexes in the model.


The third model was the turret of the deathstar.

This model was mostly remade, and added more features from the previous version.
Which became much closer to the original turret in the Star wars film.

The technique I used was mainly Boolean, extrude, outline, chamfer polygons.
Eg: all the patterns was created by Boolean method, and the two round circular shape rims in the below picture. the details were done by the extrude polygons method, then edited with the outline tools.


Assignment Model 2 - R2-D2

The second model I did was the R2-D2.

First I also did find a blue print of R2-D2 to start with.

Therefore I did not have to worry about the scale of the body and legs.
Although I only found one side view of R2-D2, but it helped the basic scaling.
 Next I started to add details on it's body, although this could be done by adding materials with such patterns
But perhaps, it would give a better visual effect and easier than finding such material.
After the experience of modelling the x-wing, I had many experiences of modelling such details.
But R2-D2 was actually more difficult, as it had a round shape body, I almost had to edit every single vertex when I add the details on. 
 I used techniques such as the Boolean subtraction eg: the green chamferbox to create the air vents.
Outline tools for those "buttons" so they were not some exact rectangular boxes.

After I had done the body, I moved on to modelling the leg.
The blue print wasn't much use after the first scaling part, as there were too many details on the blue print, it could be figured out easily, therefore most of the details were done using images from the research boards. 
 Also used all type of shapes, and edited by moving vertexes etc.


 The most difficult part was the "head" of R2-D2, by adding such shape for the patterns,
I had to use a lot of Boolean subtracting method, to cut the semi-sphere.
Also by a bit of calculation of the cutting angles etc.

 So that I could have the 3D patterns as below.

The finished model. The R2-D2!
 Legs

 Front

 Back
 Top


Assignment Model 1 - X-wing

The first model for the assignment was done with the week 3 exercise.

I used the 2D images to assist the 3D modeling technique, as long as other basic technique such as Boolean, Chamfer, Outline, Extrude, Mirror, Group tools etc.


Assignment: Mood Board, Research board, Story board


Mood Board - Star wars


The research board for Star Wars


Research board of the X-wing - My first model


Research board of the R2-D2 - My second model


Research board of the Death star and the Trench Gun Turret - My third and fourth model


The research boards noted down all the significant details and informations for each models.

Such as the scale, the colours, the patterns etc.

Which could be very useful when it came to the modelling parts.

Also noted  down some scene and relationships as well, so it could also be for the animating part.


Story board


Story Board 2

Start as a classic star wars film, coming up with the star wars opening description.

Words in yellow and same font as the film. Play star wars opening music with it as the animation plays.


Then the music and animation of the writing suddenly stop, cross the word star out and display R2-D2
The first two scenes are more like 2D animation first.


Scene 3  where the story line actually starting, with a quite serious atmosphere to show the scene of R2-D2 inserted on to the x-wing.
Using low camera angle to create an effect of high tech and powerful feeling for the x-wing.
The camera will be a stable camera, to suggest it is serious as the story is going to war next.


Scene 4: The camera will zoom in to the R2-D2, it wouldn't zoom in smoothly, but having a skip between four lens. When it come to the editing part, there will have a blurry effect when it zoom in.
Suggesting to the audience that the R2-D2 is the main character of this story line, not the x-wing, because the x-wing has shown in the first actual scene, therefore by zooming in to the R2-D2, audience would realise the main character is the R2-D2.


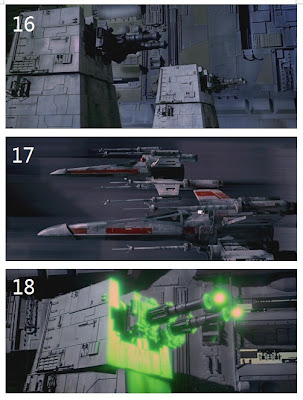
Scene 5: It will switch to a stable camera again, and many x-wings will move in the camera one by one by the elevator like platform underneath.


Scene 6: It will be a close up shot to the x-wing engines, may have a special effect of the heat waves, when the engines have started the x-wing will disappear from the scene.